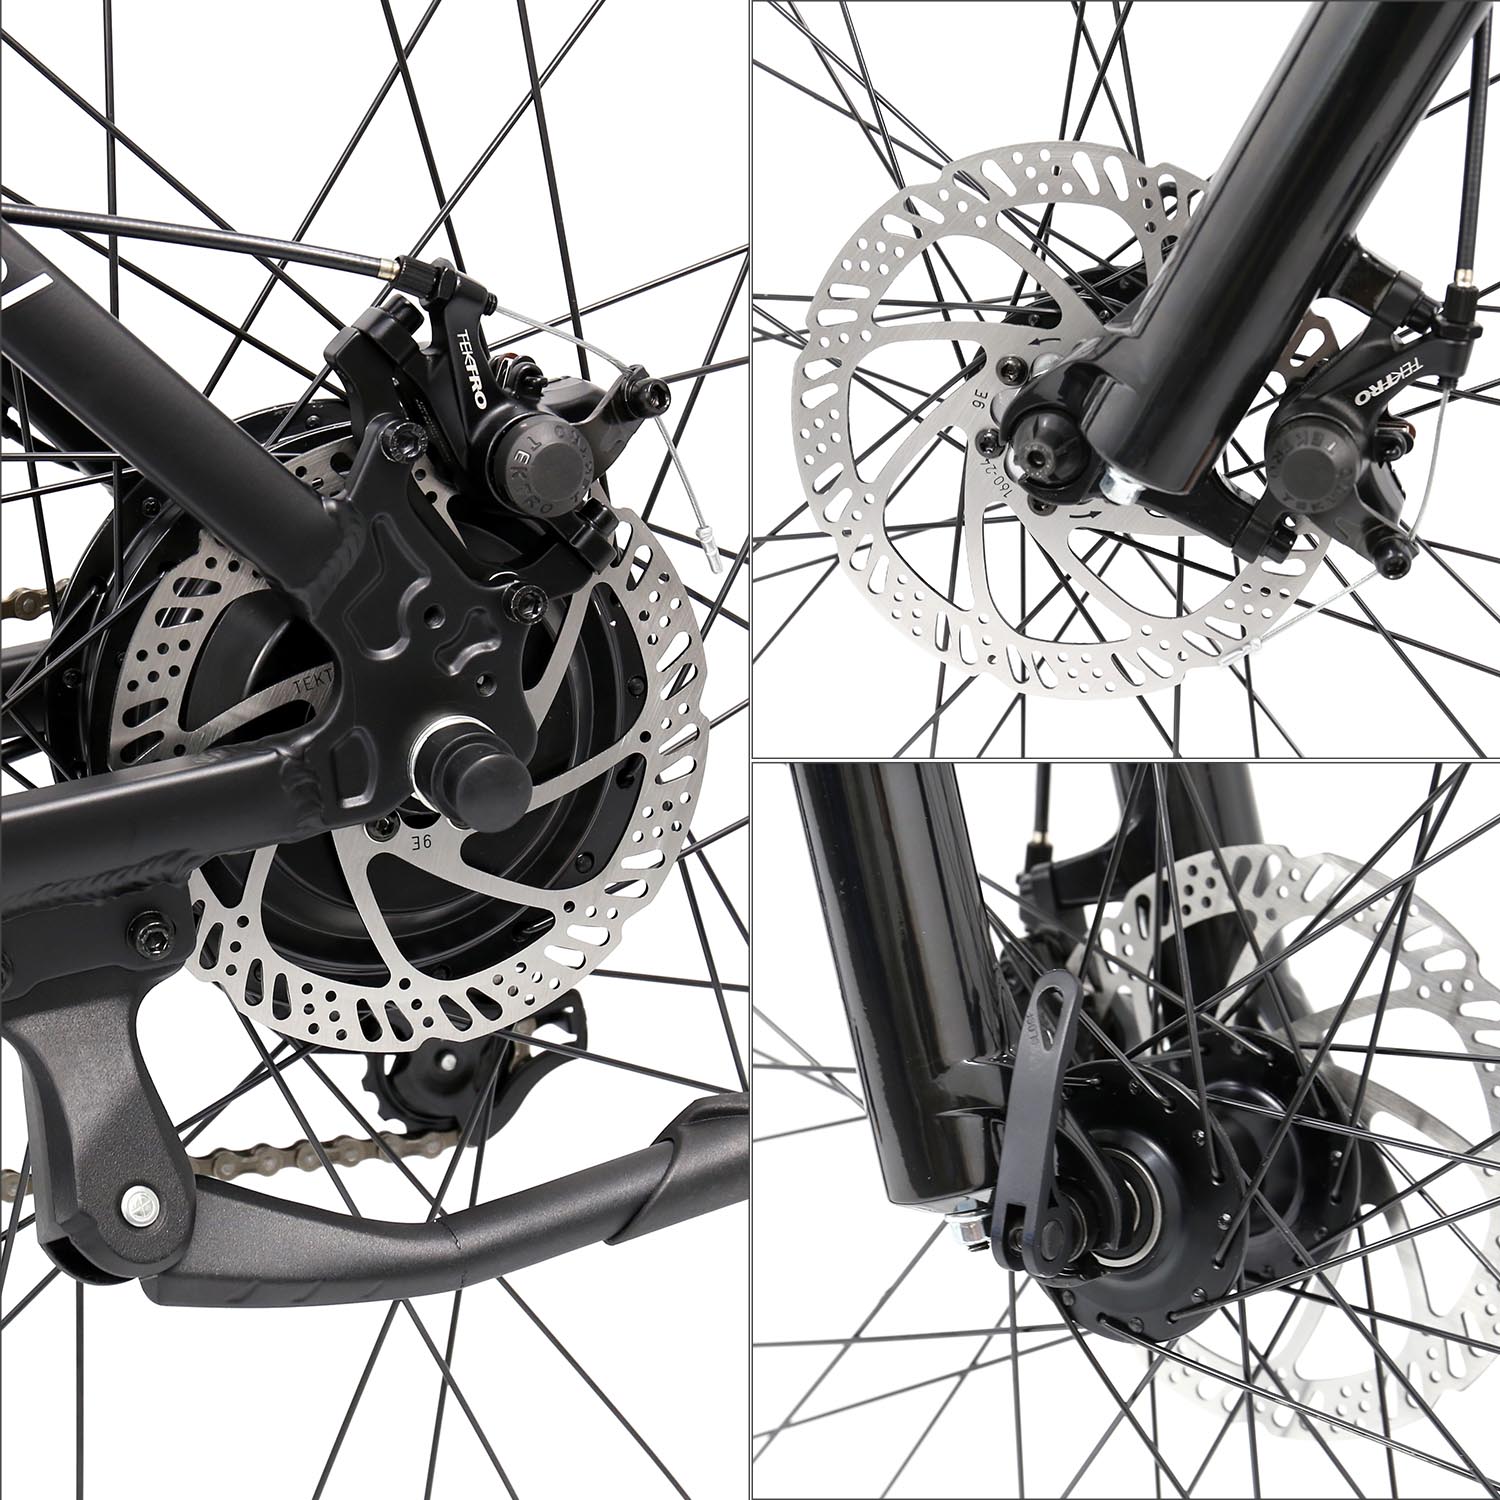
There are 5 ways to repair and maintain your e bike brakes. I hope this blog can better help you maintain your electric bicycle.
1、 Clean the Braking Rotor
One of the most common causes of braking failure is a dirty, damaged or otherwise gunked-up braking rotor.Depending on how your bike is constructed, it might be very easy for rocks, mud, sticks, and other debris to get caught up and lock up your electric bike.
Fortunately, cleaning bike rotors is easy since you primarily just need a wet washcloth or towel to run over the whole rotor disc. Remove any large debris caught in the rotor, and wipe it all down a couple of times to ensure that nothing is impeding the brake pad from pressing against the brake rotor.
As an important note, if you find any significant cracks, gouges, or otherwise missing components on your rotor, we highly recommend replacing them immediately.
2、 Make Sure Your Braking Pad Isn’t Oily
If the rotor itself is clean, the other most likely cause for fault braking is because your braking pad might be oily. The brake pad gets applied directly to the brake rotor, and depending on what you’ve been riding through may cause the braking pad to become very dirty, oily, or wet.
The wetter and oilier your braking pad is, the more slippery it will become and the less friction it will apply to the brake rotor when you pull the lever. Typically, you will want to clean brake pads with either brake pad-specific cleaners or isopropyl alcohol. Using other cleaners may make the problem worse, causing the brake pad to be even more oily or even causing it to degrade and fall apart.
3、Make Sure Your Brake Caliper is in Alignment
Over time and especially after crashes, your brake caliper may become misaligned. When this happens, you’ll have greater drag as your calipers fail to properly apply the brake pads to the wheels, causing you to take longer to slow down and potentially damaging the brake caliper. One obvious way to tell if your brake calipers are misaligned is if you hear a sharp or screeching noise when applying the brakes.
Fixing brake calipers by aligning them properly can be easy or difficult, depending on how the brake caliper is sealed. Many brake calipers just have a couple of bolts that can be loosened with home tools, though a few are tightly shut and tend to be challenging to put back together once you open them if you aren’t familiar with bikes.
Many bike shops offer easy and inexpensive caliper alignment, but if you have a brake caliper that is easy to open and want to do it yourself, follow these steps.
Open up your brake caliper body and insert a business or playing card between the brake rotor and the brake pad. Push the brake pad into the card and rotor, and adjust the caliper body until it is aligned with the brake rotor.
Slowly release the brakes, and remove the card. Apply the e bike brakes again to see if you have centered the caliper properly. If you haven’t, repeat the process.
If your brake caliper is now aligned, again release the brake lever and tighten the caliper until it is fully shut. Spin the wheel and test one more time if the brake caliper is centered, monitoring how your e bike brakes slow down the turning wheel.
4、Tighten Up All Other Brake Bolts
If your brake caliper is centered, but your brakes screech or are loud, make sure your rotor and brake pad are clean. If it is still noisy after cleaning everything, then the likely cause is that a bolt on your brake system is loose. Check over your whole braking system to ensure that all of the bolts, screws, and other parts are properly attached and tightened.
You can also check to see if anything is cracked, and giving your whole braking system a look over every couple of months will help you spot issues before they become a serious performance problem.
5、Remember to Check Your Cables
Depending on how often you ride, you will want to check your brake cables and service them every one to two years. For mechanical disc brakes, you will need to verify that the cables are attached, that everything is sealed correctly, and that proper pressure is applied to the pistons when you pull the levers.
You will need to drain and replace the fluid every one to two years for maximum riding performance for hydraulic disc brakes. There are do-it-yourself kits so you can drain and replace your hydraulic brake fluid on your own, but given how affordable it is, we recommend just dropping your bike off at a shop and letting experienced repair technicians replace the brake fluids for you.
Conclusion: Check Your e bike Brakes to Have a Safe Ride!
Brakes are easily one of the most crucial safety components on your eBike and can be the difference between having a small crash when something goes wrong or a nasty one.
A small issue with your brakes can be easily fixed–but let it linger–and it will likely lead to massive performance issues and irreparable damage to your braking system or even your eBike frame. So, take a few minutes to periodically check, adjust, and clean your e bike brakes, especially when you begin to suffer from performance issues.
It might not seem like much, but a few minutes can save you hundreds of dollars and will make sure your e bike brakes work
like they should when you need them most.
If you are interested in electric bicycles, please click on the HOTEBIKE official website:www.hotebike.com
It’s the Black Friday promotion period, and you can claim up to $125 worth of coupons:Black Friday Sales
LEAVE US A MESSAGE
 hotebike

